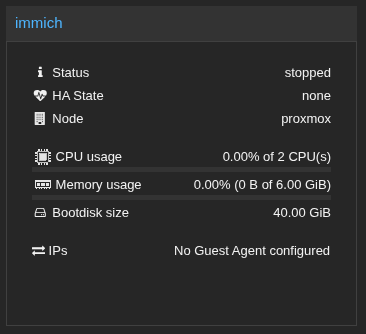
Immich VM Setup
I’ll make another Ubuntu server for my immich server. We’ll create and attach a drive for data storage, separate from the OS and application.
Homelab Subnet
On proxmox host root:
Add to /etc/network/interfaces:
auto vmbr1
iface vmbr1 inet static
    address 192.168.100.1
    netmask 255.255.255.0
    bridge_ports none
    bridge_stp off
    bridge_fd 0
systemctl restart networking
This will be my homelab subnet
Now attach VMs to vmbr1 in the web UI.
In each VM, assign a static IP In default /etc/netplan file (50-cloud-init.yaml).
network:
  version: 2
  ethernets:
    ens18:
      dhcp4: no
      addresses:
        - 192.168.100.10/24
      routes
	    - to: default
	      via: 192.168.100.1
      nameservers:
        addresses:
          - 1.1.1.1
          - 8.8.8.8
sudo netplan try and then sudo netplan apply
Edit /etc/sysctl.conf on proxmox host and uncomment or add:
net.ipv4.ip_forward=1
sudo sysctl -p
sudo iptables -t nat -A POSTROUTING -s 192.168.100.0/24 -o vmbr0 -j MASQUERADE
Now VM can connect to the internet using the host (192.168.100.1) as a NAT gateway.
Setup Tailscale as gateway to homelab subnet vmbr1
Change tailscale VM’s network to vmbr1 in proxmox.
Netplan config
network:
  version: 2
  ethernets:
    ens18:
      dhcp4: no
      addresses:
        - 192.168.100.2/24
      routes
	    - to: default
	      via: 192.168.100.1
      nameservers:
        addresses:
          - 1.1.1.1
          - 8.8.8.8
echo "net.ipv4.ip_forward=1" | sudo tee -a /etc/sysctl.conf
sudo sysctl -p
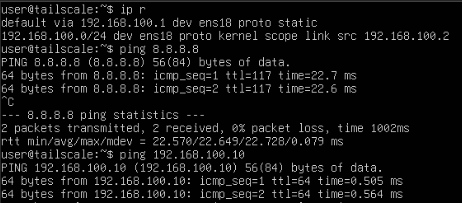
sudo iptables -t nat -A POSTROUTING -s 192.168.100.0/24 -o tailscale0 -j MASQUERADE
Now able to ping 8.8.8.8 and local VMs on the subnet like 192.168.100.10 (immich).
Now to check whether tailscale can be used to reach the local subnet. I’ll disable WiFi on my phone to ensure I’m not on the same LAN in any capacity to start with, enable tailscale, and try to reach a temporary web server on my immich machine.
Forgot to advertise the subnet on tailscale
sudo tailscale up --advertise-routes=192.168.100.0/24 --accept-routes
Approve in web
(Machines > machine > Subnets > Review)
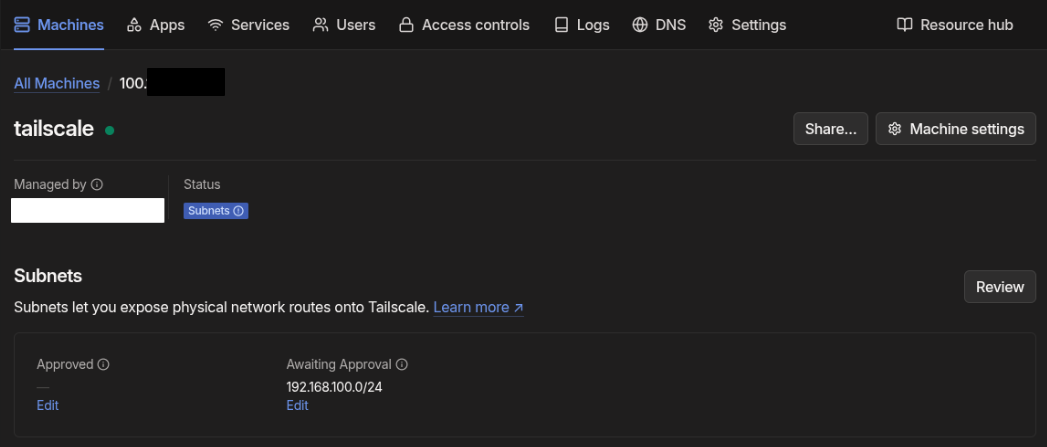
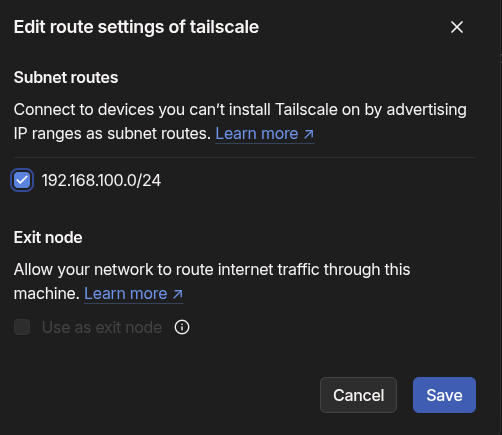

FINALLY!! Tailscale is working together with my VM subnet.
Immich Installation
Media Storage Setup
Under my immich server’s hardware, I’ll add a 300GB drive for storing all application data and photos.
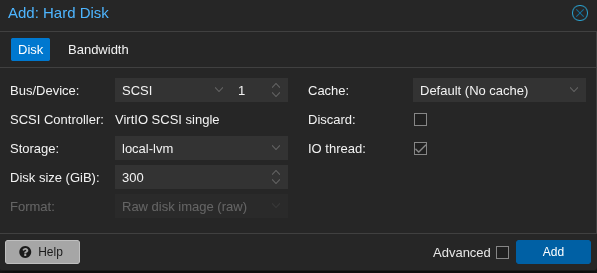
Verify it’s attached with lsblk.
NAME MAJ:MIN RM SIZE RO TYPE MOUNTPOINTS
sda 8:0 0 40G 0 disk
├─sda1 8:1 0 1M 0 part
├─sda2 8:2 0 2G 0 part /boot
└─sda3 8:3 0 38G 0 part
└─ubuntu--vg-ubuntu--lv 252:0 0 19G 0 lvm /
sdb 8:16 0 300G 0 disk
sr0 11:0 1 3G 0 rom
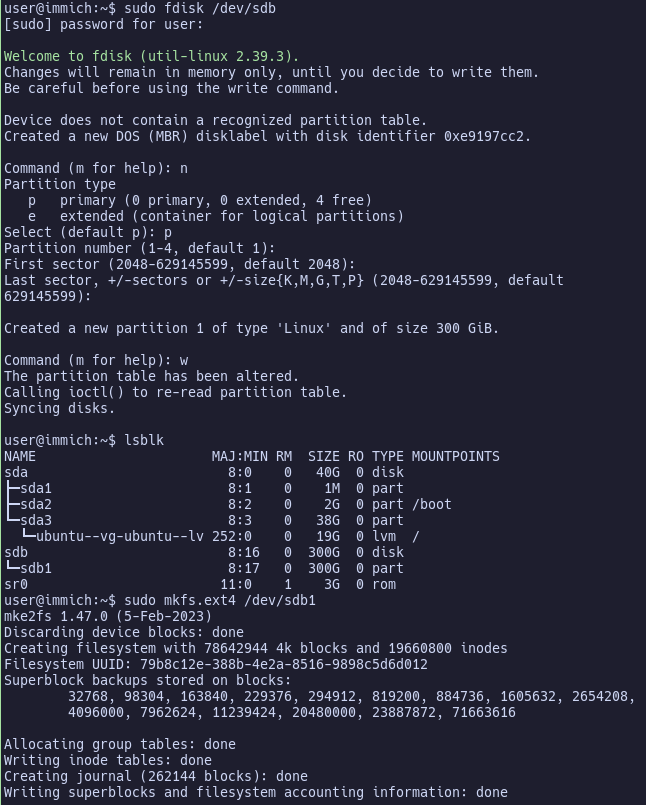
user@immich:~$ sudo fdisk /dev/sdb
Partition it with sudo fdisk /dev/sdb and format/initialize the filesystem with sudo mkfs.ext4 /dev/sdb1.
Welcome to fdisk (util-linux 2.39.3).
Changes will remain in memory only, until you decide to write them.
Be careful before using the write command.

Device does not contain a recognized partition table.
Created a new DOS (MBR) disklabel with disk identifier 0xe9197cc2.

Command (m for help): n
Partition type
   p   primary (0 primary, 0 extended, 4 free)
   e   extended (container for logical partitions)
Select (default p): p
Partition number (1-4, default 1):
First sector (2048-629145599, default 2048):
Last sector, +/-sectors or +/-size{K,M,G,T,P} (2048-629145599, default
629145599):

Created a new partition 1 of type 'Linux' and of size 300 GiB.

Command (m for help): w
The partition table has been altered.
Calling ioctl() to re-read partition table.
Syncing disks.

user@immich:~$ lsblk
NAME                      MAJ:MIN RM  SIZE RO TYPE MOUNTPOINTS
sda                         8:0    0   40G  0 disk
├─sda1                      8:1    0    1M  0 part
├─sda2                      8:2    0    2G  0 part /boot
└─sda3                      8:3    0   38G  0 part
  └─ubuntu--vg-ubuntu--lv 252:0    0   19G  0 lvm  /
sdb                         8:16   0  300G  0 disk
└─sdb1                      8:17   0  300G  0 part
sr0                        11:0    1    3G  0 rom
user@immich:~$ sudo mkfs.ext4 /dev/sdb1
mke2fs 1.47.0 (5-Feb-2023)
Discarding device blocks: done
Creating filesystem with 78642944 4k blocks and 19660800 inodes
Filesystem UUID: 79b8c12e-388b-4e2a-8516-9898c5d6d012
Superblock backups stored on blocks:
        32768, 98304, 163840, 229376, 294912, 819200, 884736, 1605632, 2654208,
        4096000, 7962624, 11239424, 20480000, 23887872, 71663616

Allocating group tables: done
Writing inode tables: done
Creating journal (262144 blocks): done
Writing superblocks and filesystem accounting information: done
Make a mount directory, mount it, and check available space.
sudo mkdir -p /mnt/immich-data
sudo mount /dev/sdb1 /mnt/immich-data
df -h /mnt/immich-data
Filesystem      Size  Used Avail Use% Mounted on
/dev/sdb1       295G   28K  280G   1% /mnt/immich-data
Next, we’ll want to create an entry in /etc/fstab to mount this volume when the VM reboots.
Get the UUID
sudo blkid /dev/sdb1
/dev/sdb1: UUID="79b8c12e-388b-4e2a-8516-9898c5d6d012" BLOCK_SIZE="4096" TYPE="ext4" PARTUUID="e9197cc2-01"
Append into /etc/fstab:
UUID=79b8c12e-388b-4e2a-8516-9898c5d6d012 /mnt/immich-data ext4 defaults 0 2
Unmount/remount
sudo umount /mnt/immich-data
sudo systemctl daemon-reload
sudo mount -a
Ensure it shows mounted in the correct place after issuing lsblk again.
NAME                      MAJ:MIN RM  SIZE RO TYPE MOUNTPOINTS
sda                         8:0    0   40G  0 disk
├─sda1                      8:1    0    1M  0 part
├─sda2                      8:2    0    2G  0 part /boot
└─sda3                      8:3    0   38G  0 part
  └─ubuntu--vg-ubuntu--lv 252:0    0   19G  0 lvm  /
sdb                         8:16   0  300G  0 disk
└─sdb1                      8:17   0  300G  0 part /mnt/immich-data
sr0                        11:0    1    3G  0 rom
Now we have a 300GB ext4 volume on /mnt/immich-data that will persist server reboots!!
Immich Installation
Follow docker instructions to get the latest version available for Ubuntu… the apt repos are a bit outdated for Immich’s provided docker-compose configuration. https://docs.docker.com/engine/install/ubuntu/
for pkg in docker.io docker-doc docker-compose docker-compose-v2 podman-docker containerd runc; do sudo apt-get remove $pkg; done
# Add Docker's official GPG key:
sudo apt-get update
sudo apt-get install ca-certificates curl
sudo install -m 0755 -d /etc/apt/keyrings
sudo curl -fsSL https://download.docker.com/linux/ubuntu/gpg -o /etc/apt/keyrings/docker.asc
sudo chmod a+r /etc/apt/keyrings/docker.asc

# Add the repository to Apt sources:
echo \
  "deb [arch=$(dpkg --print-architecture) signed-by=/etc/apt/keyrings/docker.asc] https://download.docker.com/linux/ubuntu \
  $(. /etc/os-release && echo "${UBUNTU_CODENAME:-$VERSION_CODENAME}") stable" | \
  sudo tee /etc/apt/sources.list.d/docker.list > /dev/null
sudo apt-get update
sudo apt-get install docker-ce docker-ce-cli containerd.io docker-buildx-plugin docker-compose-plugin
Test installation
sudo docker run hello-world
Follow instructions on https://immich.app/docs/install/docker-compose
I’ll update my .env to make the paths go to my external disk mounted at /mnt/immich-data.
After following the docker install instructions I can reach it in my browser! Awesome.
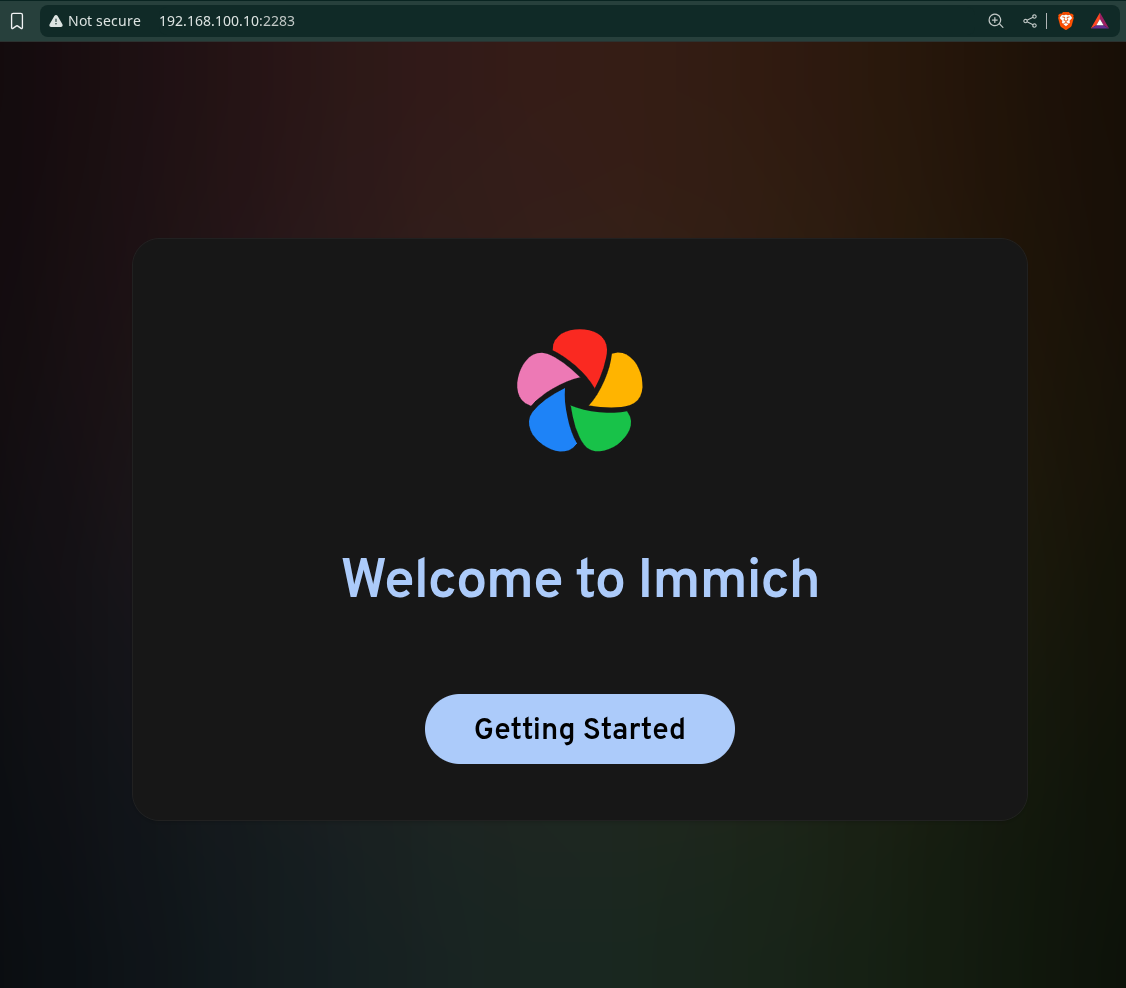
The next screens allow us to set an admin email and password, and get started with basic configuration.